Article

FileHippo for the Best Solution of Download Website

In this technology era, you will find many advanced things which can help you to do something in an easy way. One of the advanced things you might see is an internet. While you are surfing on the internet, you will find there are thousands of websites which can help you to find out information.

The provided information will be different from each other as if FileHippo. Have you heard about it before? Many people say that it helps you a lot to get the software you need for your laptop or PC.

Do You Know About It?

Well, FileHippo is a download website which provides computer software for Windows only. Thus, if you use Windows as the operating system in your laptop, you can use this website to download software you need. It has updated software you can choose whether want to download the newest one or the oldest one.

You should not feel so worried whether you would like to download the oldest one because they still keep the oldest files in their system. Thus, while downloading the oldest version of the software, you still have a chance to get the oldest version of the software itself. Some PCs require the oldest version and not supported for the newest version. It is the right chance for you to get the oldest version of the certain software you need.

Is It Easy to Use?

If you want to download the certain software and you find it on this website, you can start to download it. It is an easy way to use. First, open up their official website. Then, you can find the file software you need to download. The search tag will help you to find file software easier. You just have to type the name of file software and search it.

Then, you can choose one of the files software you would like to download. Make sure you choose the right files depending on your laptop specification. After that, you can see a download button on the bottom of the file software. Click it. Then, you just have to follow the direction until it has started to download.

It is so easy to use, isn’t it? After your download is a success, you can start to install and run the software on your laptop. Usually, the newly downloaded software will appear on your desktop screen. Thus, you just have to double click on it, follow step by step. Till then, the software is ready to use in your laptop.

Is It Available for Smartphone?

Unfortunately, this site is just available for PC only. You can’t download the software from this site to your smartphone. Even if your download has success, you can’t install and run the software right away. In other words, don’t force your smartphone to download, install, and run software for PC from this website.

20 Most Popular Apps in FileHippo

You should not be afraid to use this download website because there are many people who have downloaded software on this web. You also can see that there are many positive reviews from any users through this site.

With many options for software which are provided on this site, there is some popular software which many people search for. There are:

–    Avast Free Antivirus

–    CCleaner 5.46.6652

–    AVG AntiVirus Free

–    HMA! Pro VPN 4.2.129

–    uTorrent 3.5.4 Build 44520

–    VLC Media Player 3.0.4 (64-bit)

–    WinRAR (64-bit) 5.6.1 beta 1

–    Recuva 1.53.1087

–    Adobe Acrobat Reader DC

–    Speccy

–    VLC Media Player 3.0.4 (32-bit)

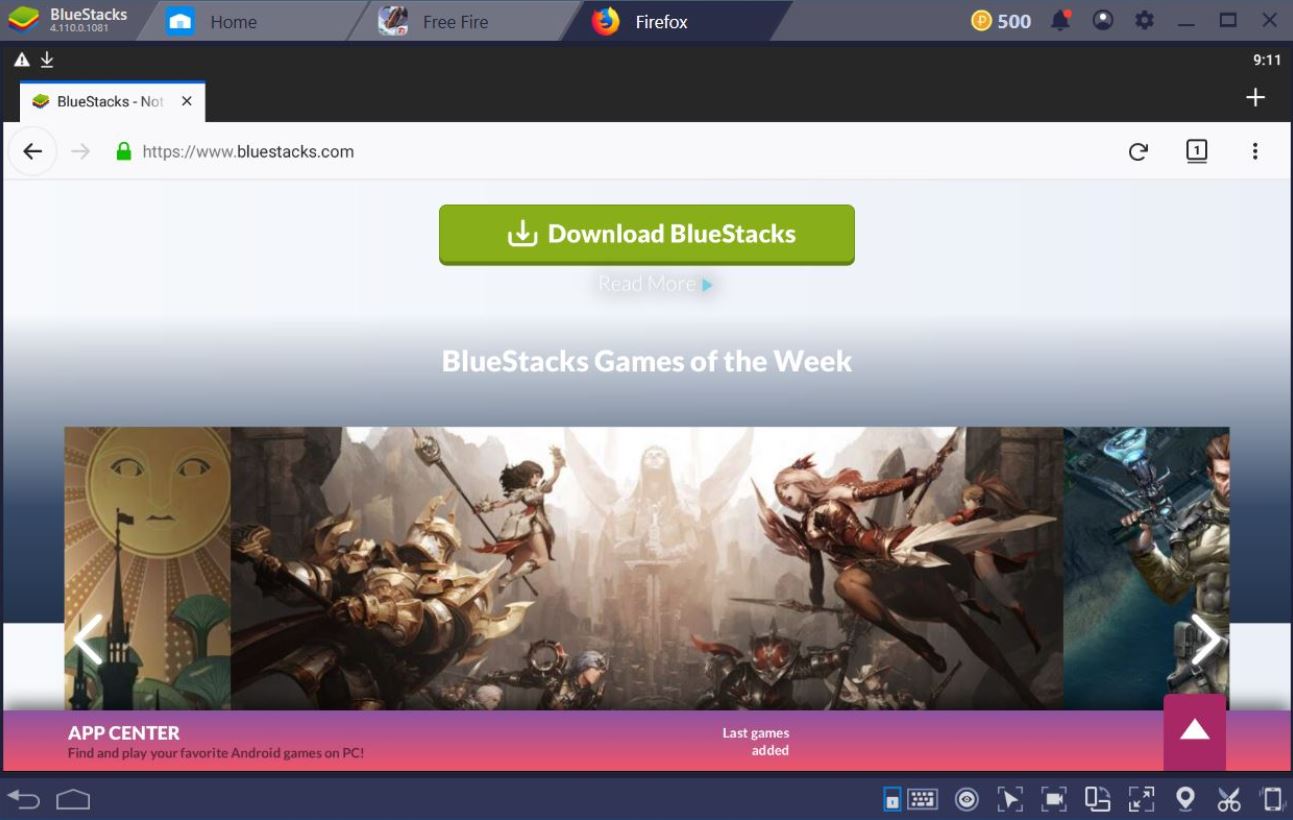
–    Blue Stacks App Player

–    Firefox 62.0

–    Microsoft Office 2013

–    WinRAR (32-bit) 5.6.1 beta 1

–    Google Chrome

–    TeamViewer

–    Defraggler

–    Internet Download Manager

–    .NET Framework Version 4.7.2

Those are the popular downloaded software in this site. If you need software, you just have to search and find it because this site provides any software which is needed by many users. After using them, you are able to leave your reviews based on your experience using this site.

Your review will help the developers to know about the problem you might face while downloading the software from their site. It helps them to develop their site to be better and better. Thus, you can participate in FileHippo Website by reviewing the experience of using their website to the other online users.

Continue Reading
Info

How to Take Screenshots on Windows 10

Do you need to capture Windows screen? Whether you want to share with colleagues or simply wish to save the display, screen-capturing makes everything easier. The question is, how to take a screenshot on Windows 10?

There are few ways that you can do to take a screenshot, be it for the entire display or only part of it. Upgrade your computer skills and learn how to capture screen on Windows 10 right here.

Ways to Take Screenshots on Windows 10

Windows 10 comes with built-in tools that enable you to capture screen with ease. Unfortunately, not many users know this feature. Check out the following list and get inspired!

1. Snipping Tool

Snipping Tool

This built-in tool has been around for a while. Since Windows Vista, the Snipping Tool becomes a reliable feature to take screenshots on PCs. How to use this tool is super easy as it doesn’t require too many steps. Learn how to use Snipping Tool below:

  • Open Snipping Tool from your search bar.
  • Once opened, click New button and choose the area you want to capture. It can be in a rectangular form, free-form, and full screen.

Please note that it won’t automatically save the screenshots. You will need to save it manually before exit.

2. Snip & Sketch

Snip & Sketch

Snip & Sketch is a newer version of Snipping Tool. This built-in tool lets you take screenshots and share it as a new image file. Without the need of downloading, you can easily call up the tool with keyboard shortcut.

Here is how to take a screenshot using Snip & Sketch:

  • Press Windows key + Shift + S.
  • Once you press the keys, the screen will dim.
  • You should also see a small menu at the top of the screen. This menu can be used to take a screenshot, either free-form, rectangular, or full-screen.
  • Drag the pointer to determine the area to be captured.
  • Once a screenshot is taken, it will be saved to clipboard.

In case you access Snip & Sketch from the Start menu, you will see a window at the top of the screen. Click New button and move the pointer to capture the desired part of the screen.

3. Print Screen

Print Screen

As you can read on Androidally.com, Print Screen is one of the easiest ways to capture screen on Windows 10. With Print Screen, you don’t need to open a tool or install any apps. Everything can be done right from your keyboard.

However, your screenshot is not saved as a file. Instead, it will be copied to your clipboard. That means you can copy the captured screen on MS Windows or open via Microsoft Point.

How to take a screenshot using Print Screen? Follow the steps below:

  • On the desired display, press PrtScn on your keyboard.
  • Open Microsoft Word or another image editing tool, then copy the screenshot.
  • If you choose to use MS Word, press Ctrl + V to copy.

Print Screen is the quickest and easiest way to take a screenshot. However, it only works to capture the entire screen.

4. Windows Key + Print Screen

Windows Key + Print Screen

Still using Print Screen, there is another way to capture screen and save it automatically as a new file. By pressing Windows Key and Print Screen accordingly, you can take a screenshot of the entire display.

With this method, the screenshots will be saved to the Screenshots folder instead of copied to clipboard just like when you press only Print Screen. Here is how to get it done:

  • On the desired display, press Windows key + PrtScn.
  • The screen will dim, which means the screen is already captured.
  • Go to Pictures, then choose the Screenshots folder to find the image.

Taking screenshots on Windows 10 is not a big deal. Now that you know several ways to capture screen, you can easily share with friends or save the display for later.

Continue Reading
Review

5 Best Weather Apps for Android

Knowing the weather today beforehand will benefit to us. Watching tv can be one way to know the prediction of weather today. But, now you can always know the weather from the smartphone using one of the best apps for weather Android.

As you have known, there are many weather apps for Android. That’s why it’s not surprising that you’re confused about which app you should install on your phone. The most important thing you have to consider is how precise the weather prediction of the app is. So, with that thing in mind, here some recommended weather apps for your Android:

1. Accuweather

Accuweather

One of the best apps for weather Android is Accuweather. The most notorious thing about this app is how accurate this app in predicting the weather. Moreover, it can predict minute by minute.

However, that is not the only thing Accurate can do. This app also will tell you when the rain will fall and the intensity of the rain. Even the ultraviolet index can be known just by looking at this app.

2. Today Weather

Today Weather

You can count in Today Weather as a weather guide app on your Android. This app has various features including the basics. You can see how the weather conditions today on the top of the app.

If you use this app, you can get weather predictions based on your location every hour. Not only that, but you also can also see the humidity, the chance of raining, and even the moon phase. For the weather app, Today Weather is rather detailed.

3. MyRadar

MyRadar

MyRadar is app weather for Android that can be used to predict the weather and chance of raining. There are various features in this app. But, the one that stands out the most is the ability to play the animation so you can know whether the rain will come.

In general, this app is very simple. But if you want to give additional features, you can do so in the app purchase. For the place that constantly has a hurricane, buying the additional features may benefit you because one of those features is a hurricane tracker.

4. Overdrop

Overdrop

For you who love simplicity, then Overdrop is the right weather app for you. This app only has one page, so you can get all the information you need in one glance. Also, there is cute animation on the page that shows the condition today, so it can raise up your mood.

On the top of the page, you will see the general condition. But, beneath it, there are several details such as temperature, wind details, and hourly weather forecast.

5. Google Weather/Assistant

Google Weather/Assistant

If what you’re looking for a good weather app, then you may choose Google Weather. This app is automatically installed on your smartphone and totally free. Moreover, you can make the shortcut version on the home screen.

That’s not all, Google Weather also can predict the weather quite accurately. With the help of Google Map, you will get the weather prediction based on your location.

Installing a weather app on your smartphone will give you information about how the condition today. So, you can prepare for the worst. However, choose the best apps for weather Android to get an accurate prediction. Download 5 best apps above on free drivers and software.

Continue Reading
Review

5 Best Barcode Scanning Apps to Ease Your Life

A barcode scanner app is another solution to get an easy life. In this fast-moving era, everybody wants everything simple and quick. So, you should have that app on your phone. Find out the best apps for barcode scanning here. You can use the app everywhere, whether for transactions or see more information about something.

All the best apps for barcode scanning below can be installed both on the phone or tablet. Also, it allows us to operate with iOS or Android. One thing you should know that this app is not only useful for the customer. For small business people or enterprise users, it could be an inventory management tool, ticketing needs, and asset tracking. Now, make sure your camera is turned on, then pick one of the apps here:

1. QRbot

QRbot

You can find this app on Google Play Store and it is free. This is an app that supports you to scan barcode and QR code. After that, its users can open the URLs, Wifi password, and contact information. If the users want to back up their history, they can convert their activities into .csv file and transfer to Google Drive.

2. FIXR – Entry Manager

FIXR - Entry Manager

For those who are holding an event would need this app. The Entry Manager makes the check-in process fast and easy. Each guest will get a unique code, so you are free from a duplicate issue or any administrative burden. It is convenient for your people and at the same time, it eases you to review the event through a web portal.

3. Smoopa Shopping

Smoopa Shopping

If you are iOS or Android users who love shopping, then you should have this app on your phone. Many bloggers and Pinterest users use Smoopa Shopping to share local products and their prices. After that, they will earn rewards for every purchase. So, get the advantage of this app and find more loveable things around you.

4. Scan to Spreadsheet

Scan to Spreadsheet

This is one of the best apps for barcode scanning to collect data and other information simply. You can input information on its database after scanning the barcode. No matter if you are the iOS or Android user, you are able to import the data into various programs or send it to your email. Download now and cut the unnecessary cost from your daily operations.

5. ShopSavvy

ShopSavvy

It has to be on every shopper’s phone. By using this app, you are able to compare products’ prices among retail outlets. You can get this info from Amazon, Walmart, Newegg, Wish, eBay, and many others. More than that, ShopSavvy will give you the product information too. Besides scanning the barcode or QR code, you can also search by inserting the keyword to expand the result.

Those are the best apps for barcode scanning that we recommend. Actually, today many developers create a similar app for various needs. So, know your needs and find the right app. Make your life easier by taking advantage of technology innovation. Furthermore, if you want the more complete service, you can upgrade the app into a premium version. It would make your day more convenient.

Continue Reading
Review

4 Best Power Banks For Gadget Lovers

For people who depend too much on a smartphone, the existence of a power bank is like a savior. Since it can help to charge a smartphone even without electricity, the power bank is highly demanded. However, as there are many brands of smartphones, the power banks also come in various brands. Each of them offers the best quality of power bank. So, do you want to know the best power bank brand?

1. Anker PowerCore 20100

Anker PowerCore 20100

Large capacity and super-fast charging bring The Anker PowerCore 20100 to be one of the best power bank brands. When using this power bank you can charge an iPhone 7 about seven times. It also can be used around five times to charge Galaxy S6. So, you don’t need to worry about your smartphone out of battery while bringing this power bank.

Not only has large capacity but The Anker PowerCore 20100 also fast when charging. It’s all thanks to the technology of PowerIQ and VoltageBoost that it can recharge just in 10 hours with the 2 Amp charger.

Moreover, this power bank has many safety features in it, so you don’t need to worry about whether it’s safe or not. However, for a power bank with such capacity, it should have more than two charging ports.

2. GETIHU 10000mAh Power Bank

GETIHU 10000mAh Power Bank

GETIHU 10000 mAH is very thin and light makes it very easy to bring everywhere. There are two USB ports so you can charge more than two devices simultaneously. If you’re the type that is hard to live without a gadget, this power bank is the right choice for you.

Additionally, GETIHU also has a high capacity so there will be no problems if you charge your device continuously. Moreover, there are several safety features in this power bank so its safety is guaranteed. The only downside of it is that though there are two USB ports, there is only one port with 2.1 A,  meanwhile the other is just 1 A.

3. RAVPower 22000 mAh Power Bank

RAVPower 22000 mAh Power Bank

When talking about the best power bank brand then RAVPower 2200 mAh will come to the surface. This power bank has a large capacity so you can charge a gadget multiple times. For example, an iPhone 7 that you can charge using this power bank eight times.

Also, there are several USB ports attached to this power bank so you can charge both the iPhone and iPad. What’s more, even though there are multiple USB ports, all of the ports have the same speed that is 2.4A. And you don’t have to worry about the safety of RAVPower 22000mAh Power Bank as it features the latest safety technology.

4. EasyAcc 20000mAh Power Bank

EasyAcc 20000mAh Power Bank

With a capacity of 20000 mAh, EasyAcc Power Bank can charge a gadget multiple times. Although it has a large capacity, when charging it doesn’t require so many times like the other power bank brands.

Furthermore, this power bank has many USB ports that make it possible to charge several devices at the same time. You can also use this power bank as a flashlight. However, after some time passes, this power bank loses its effectiveness in charging.

As the best power bank brand, these power banks offer many benefits. And what the power bank you choose is up to you. But if you want to know more about them, you’re welcome to visit Sylvia Juncosa.

Continue Reading
Info

How Updates For Bluestacks Without Losing Data

How Updates For Bluestacks

Sometimes the application you use won’t last long. Even the performance is not as good as before so that it will disrupt your activities. Therefore, you must make updates for Bluestacks to get even better performance results. The following is a way to properly update the Bluestacks application so as not to lose data.

How Updates For Bluestacks

1. Don’t Uninstall the Installed Bluestacks

The first thing you should do when updating the Bluestacks application is not to uninstall the installed Bluestacks. As the name suggests, the update is to renew instead of replacing the application with a new one. Therefore, this is the answer to the most popular question, is Bluestacks safe to use?

Of course, Bluestacks data is very valuable and it’s a shame if you have to lose it. Because it will be very inconvenient if you have to re-enter data or even replace it with a new one. Therefore, once again do not let you uninstall the existing Bluestacks application because it will make your data disappear.

2. Check your Bluestacks Version

One of the several ways updates for Bluestacks is checking the latest version of your Bluestacks. If your Bluestacks version is below the latest version, then it is safe to do. But if your Bluestacks version is very far from the latest version, you should not just update.

Bluestacks Version

This can affect the success or failure of the update that you do. It could be that the Bluestacks application was not successfully upgraded and you cannot use the application anymore. Therefore, make sure to check your Bluestacks version before updating it.

3. Download Latest Setup of Bluestacks

One of the several ways updates for Bluestacks is to download the latest version of the application. Of course, you have to do this to update your old application with a new one. You should download from the official website of Bluestacks to be safer or avoid viruses. Do not occasionally download the application from other unofficial websites.

Of course, to update if you haven’t previously removed the Bluestacks application, you must have the latest application. The reason is that all the updated specifications are in a new application. Therefore, it is safer if you download it from the official website because it is certainly more reliable.

4. Install the Latest Application

One of the several ways updates for Bluestacks is to install the application that you have downloaded. The trick is to open the download folder where the application is located. Then do a double click or right-click and select open. After that, select Next until the window shows the installation process. Then wait a few minutes for the process to finish. That way your Bluestacks application has been updated without losing data.

That way your Bluestacks application has been updated without losing data. Then you can prove whether the update process was successful or not. The trick is to try to open the application. If it appears as usual then the process is successful and you can use it again.

That’s 4 ways to update Bluestacks that you can do without making data disappear. Data in an application is very important and will be troublesome if lost. But if you do the update correctly then you will not lose data. Therefore, the explanation above is to help make an update without losing data.

Continue Reading
Info

How To Remove A Section Break In Word Document

Section Break In Word Document

What should you do if you want to make a document with different formats? Section Break tool will help you to do that. However, what if you want to change the document with a different format into one same format? Well, you can also use this tool. To be more precise, you just need to remove Section Break in the document. Just like how easy it is to insert Section Break, the method of how to remove a Section Break in Word is also simple and easy.

Remove Section Break Manually

There are some ways to remove Section Break in a document. One of them is breaking it with a manual method. This method is very easy. You don’t need to spend much time just to remove this tool.

Remove Section Break Manually

  • The first step on how to remove a Section Break in Word manually is to click the menu home. There, you will find a tool with symbol ¶.
  • After that, click that symbol and all the paragraph marks and symbols of hidden formatting will appear on your monitor. What you need to do next is find the Section Break symbol in your document.
  • When you have found the Section Break symbol you want to remove, move your cursor onto that symbol.
  • Then,  just press the delete key from the keyboard. And voila! The page where the Section Break is removed now has the same format as the page before.

If you want to remove more than one Section Break, you can find the other symbol and delete it with the delete key.

Using Find and Replace Features to Remove Section Break

Removing Section Break in Word is not limited to the manual methods. You can also use the features that already exist in Word. It is a Find and Replace feature. And you can find the steps on how to remove Section Break in Word using Find and Replace features here :

Using Find and Replace Features

  • First, you need to go to the home menu. On the right side of this menu, you will find Replace and click it. But, you can also press the Ctrl+H key in your keyboard if you can’t find the replace menu.
  • After you click Replace or pressing the keys, a dialog box will be open. There are two columns in the dialog box. The first one says Find What, while the other says Replace with.
  • You need to write ^b in the Find What column and type nothing in the second column.
  • After that click Replace all and you will see another dialog box that says how many Section Break you’ve successfully deleted.
  • Click OK on the dialog box to finish the steps and close the dialog box.

Now, there is one format in your document.

The method on how to remove a Section Break in Word has the same difficulty with how to insert Section Break. If you’ve already got used to Microsoft Word, neither insert Section Break or Remove Section Break will bring you any trouble. What you need to remember is, if you remove Section Break on a certain page, the page before and after the break will combine into one page. And the format will follow the second page.

Continue Reading
Info

5 Things About Lemongrass Life Cycle You Must Know

Lemongrass Life Cycle

Planting lemongrass is easy but quite tricky. It can grow inside and outside your house. Luckily, you don’t have to be in tropical lands too. Even in the winter or rainy season, you can have them on the pot inside your house. That is why you need to learn how to harvest lemongrass in any climate and media. But knowing the lemongrass life cycle is important too.

The lemongrass life cycle is not like other herbs. We can say that it is fast-growing, and you can get unruly when it is not pruned regularly. Moreover, when your lemongrass gets enough sunlight. The plant will absolutely fertile and quickly grow into a bundle. Remember, the keys to planting lemongrass are the sunlight and the water to keep it moist.

The Lemongrass Life Cycle

Planting the lemongrass can be started by using its stalk or bulb with the attached roots. Choose the tough stalk the put in the pot with water. The other method is by using a pot with soil. Place the bulb in the pot. Make sure the roots are covered by the soil. By trying these two methods you only wait for about one month to get them re-rooted. More details about its growing process, see the lemongrass life cycle below:

  1. Sow and Plant

It is better for you to start planting the lemongrass in the early summer. The soil is warm and suitable for the roots. Choose the right stalk, which has a tough structure, and put inside the water. Or, you can also cover the roots with soil. Place the pot inconvenient space of sunny spot. Your lemongrass will love it.

  1. Re-rooting

It takes about one month to get this process completed. The new root will raise approximately after a month since it is sowed. So, that is why we suggest you start in early summer to get this process at the right time. If you see the roots are growing, or the leaves appear, it means your lemongrass is growing. Cut back the leaves in 3 inches (8 cm) length.

  1. Troubleshooting

Just like planting the herb, there will be pests bother. For example, when you put it inside your house, the spider will be its enemy. And as the lemongrass grows, it might need a bigger place to develop. Also, if you keep it in the same spot, the plant may rot in poorly and form a tight clump. Use a sharp spade and move the plant to a larger pot as needed.

  1. Trimming

Trimming is an important part of planting the lemongrass. It is good to manage its size due to stimulating new growth. Cutting the stalk and use it for cooking will keep the plant in check, but however, you cannot hold it’s quickly growing. The lemongrass will get pruning. The best time to do trimming in early spring or when it is dormant. You might find the dead material or dried parts. Get rid of those parts.

  1. Harvest Time

You can harvest lemongrass anytime once the stalks reached 1.3 cm in diameter. It is enough to be harvested. Cutting them at the ground level by using a knife. Another sign that your lemongrass is ready just the leaves. If it is 10 inches tall, cut them and use them for your dishes. When you remove the leaves, you won’t hurt the other parts. Your lemongrass will keep growing.

If you don’t use lemongrass in cooking very often, remove the leaves or wilted parts regularly. Or, you can move the healthy stalks to another pot. Don’t forget to bring the roots too. The lemongrass life cycle is counted fast. Once you forget to manage its crowd, you will find a messy corner inside your home.

Continue Reading
Printer

Canon imageCLASS D1650 Review, A Wireless All-In-One Laser Printer

Canon imageCLASS D1650

Are searching for an affordable with a high-performance printer? Perhaps you should consider the Canon imageCLASS D1650 now. Since Canon keeps innovating its products, this printer is suitable for your small business to mid-size office. This article will let you know more at glance about this printer.

By using Canon imageCLASS D1650, you can accomplish your works just in time. What do you need to do? It will help you from printing document until sending it via fax. Compared to the other similar printer, Canon is so worth to be placed inside your room. Still not believe it? Read these points below:

Canon imageCLASS D1650 Features

  1. The Look

By seeing the look, you will get a simple with a multitasking impression of it. It is designed to accomplish your daily tasks with the 5” LCD touch screen. The screen is absolutely bright and large, you can easily set the printer through it. There is an Application Library platform, so, you can adjust its display look based on work routine.

This device is white and suitable in every corner. Because of its color, you can match the printer with any wall color. It would not bother your interior design. Plus, with its 2,300-sheet paper capacity, you will not think it is too big for your room.

  1. Functions

At the top part, we already told that Canon imageCLASS D1650 will help you from printing until faxing. Yes, that is true, this printer is able to print and send a fax from your gadget. You will know how incredible it is from its connectivity. Well, we will discuss it as the next point.

You can also scan with this device. Just choose your document and let the printer does what you want. After scanning, it could convert your document or making it more through the duplexing document feeder. So, when you are making the two-sided document, you don’t need extra effort.

  1. Print Speed and Quality

Accomplishing your works with no more efforts and spend much time. The printer first-print-out time is about 6.2 seconds. It could reach the printing speed up to 45 ppm, while for overall print speed is up to 45 pages per minute. Canon suggests 2,000 – 7,500 pages as monthly page volume.

About the resolution, the maximum printing resolution is up to 600 x 600 DPI. It is applied both for black-white and color document. As additional information, it is also the quality for your scanning image result.

Canon imageCLASS D1650 Inside the Box

  1. Connectivity

Since Canon imageCLASS D1650 is a wireless printer, so it is obvious that the device could connect to the Wi-Fi easily. You have no problem when your computer is far from the printer. As long as both devices are connected to the internet, you can do whatever you like with the printer.

The printer offers you a Cloud-based application, like Canon PRINT Business App, and others. You are able to print from anytime since it is synced with your cloud. Free your self from any boundary, now all can be accomplished by printing on the go.

  1. Support and Warranty

Last but not least, good information from Canon is its warranty. By having this printer, you will get a 3-year limited warranty. Considering that Canon is a big brand and trusted company, they will lead and give an excellent service for every customer.

Get their attention through call or online live chat. Their expert will guide you and give assistance every time you need. Quick and seamlessly as possible, also value your work very well. So, there is no hesitation any to use this printer.

During its innovation, Canon takes pride in making a printer for customer efficiency and success. Canon imageCLASS D1650 is one of its great printers. Besides, some people are familiar with the brand. If you still feel doubt about it, just take a minute to find how great their products are.

Continue Reading
Info

5 Things What You Need To Know About Instagram Captions

Instagram Captions

Instagram captions are a must when it turns out that you have a picture to post. Moreover, if you like posting on Instagram, that captions are what make your picture alive. What you need to know about Instagram captions is about how to write the good captions.

Most of Instagram users use captions to express their feeling. Moreover, there are more things that you need to know about Instagram captions. Writing good captions will make you get more likes and followers.

What You Need To Know About Instagram Captions

Here are five things that you need to know about Instagram captions.

  • Hashtags

Hashtags have an important role in Instagram captions. Using hashtags shows where the captions go. Moreover, it tells a lot about what the writer is trying to write. Hashtags make the post more natural and creative.

In most of the competition, hashtags are a must. Most of the participant has to follow some requirements involving writing a hashtag.  Therefore, involving hashtag in writing a caption could make your caption more unique. There’s also another advantage of the hashtag. It’s to make others easier to find some related posts.

  • Emojis

Most Instagram users love using emojis to express their feeling. Sometimes, the word can’t represent our feeling. Thus, emojis become a choice for a caption. Giving one emoji in a post could show many meanings. Moreover, writing captions and put emojis at the end of the sentence to show emotion.

You could use emoji to express the different meaning of what you are trying to write. For instance, you could write “I’m happy now” followed by sad emoji. It shows that you don’t feel happy but you are trying to be happy.

  • Tags

Apart from hashtags and emojis, tags also have the same roles. Tagging friends in your post will make others feel their existence. In addition, tagging is also one way to interact with others like your friends.

If you are a marketer and do a giveaway, tagging is worth a try. By asking the audience to tag their friends, it will add more followers. This is one thing what you need to know about Instagram captions.

  • Word Choice

Word choice plays an important role in writing a good Instagram caption. You have to use some words matching with one another. Moreover, if you use the proper words which can describe the picture you post. Word choice becomes something crucial in writing a caption.

Therefore mind what you are trying to say. Use a proper word and try to avoid bad words. The words that you use show who you really are.

  • Picture

Select the best picture on your phone when you want to post it on Instagram. Mind the angle and the light. In addition, use the real picture and not the fake one. Your picture will attract anybody who sees it.

Thus, using a good picture with good quality is a must. Remember, on Instagram you have followers and they see what you are doing.

Those all about five things what you need to know about Instagram captions. Writing a good caption will give you many benefits. Moreover, if you are a marketer, writing good Instagram captions will help you the most.

Continue Reading
Info

How To Turn Off Waze When Not In Use Completely

If you are looking for a solution on how to turn off Waze when not in use, this time you are lucky enough to find this article. It is because sometimes you may get the situation where you can still see the Waze location on even though you quit the Waze app.

Now the question is; why do you need to turn off the Waze when it is not in use? When it is not troubling you then why you have to turn it off? Well, in this case, you have to know that letting the Waze on is influencing the battery to get low quickly. Therefore, it is much recommended to turn the Waze on while driving and turn it off when you have reached the destination.

To turn off Waze completely, you need to know more about the Waze map and location change reporting (iOS only) as well as how to turn off the Waze app.

Waze Map Location Service

If you are iOS users, there are two options for Waze location access. Take a look by going to Settings -> Privacy -> Location – > Services -> Waze. In this case, you can choose to manually turn on the Waze app every time you use the app on your phone. However, you can choose the option “While Using The App” to allow the Waze to use the location service only when Waze app is used.

Location Change Reporting (iOS Only)

Typically, Waze will access your recent location although you are not using the app to alert you about the calendar event on your iOS particularly when you plan to drive or when you want to leave notification.

In this case, Waze uses the location change reporting feature to leave the reminders through the iOS calendar events.

How to Turn Off the Waze App

If you see your battery is going to drain quickly because of the Waze status which is always on, you might go think about how to turn off Waze when not in use. Battery draining may cause you to feel uncomfortable so that you have to turn off the Waze soon. In this case, you can do it by opening the Waze App > Go to Waze settings > General > location change reporting > turn off.

It is important to remember the step above in order to successfully turn off the Waze while you are not using it. Once you successfully turn it off, there will be no notification “Time to Leave” as the reminder from your Calendar events or planned drives.

By turning off the Waze, you will be no longer feel unpleasant because of the reminders and the draining battery. Just remember the step of how to turn off Waze when not in use especially when you have more planned drives.

Conclusion

In conclusion, experiencing difficulty on how to turn off Waze when not in use will soon disappear from your problem list as soon as you practice what you have just read on this article.

Continue Reading